How to Clean a Vape Tank Properly for Best Performance?

Time:2026-05-25 Author:Sophia
0%

Cleaning a vape tank is essential for maintaining optimal performance. According to Tom Johnson, a vaping industry expert, "A clean tank ensures the best flavor and vapor quality." Many users overlook this routine, leading to subpar experiences.

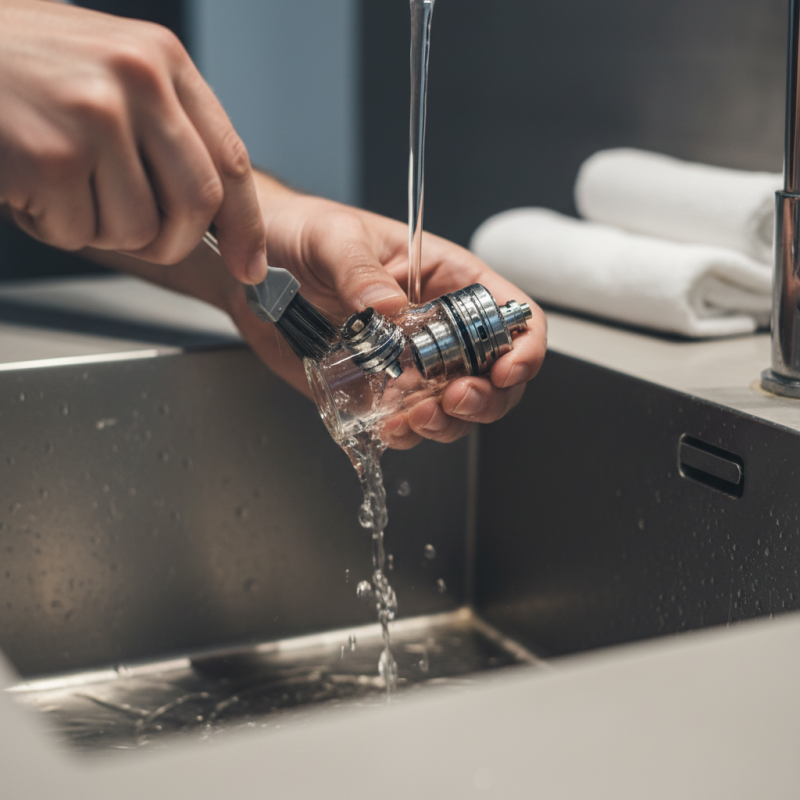
Understanding how to clean a vape tank properly can prevent issues like burnt taste and buildup. Make sure to disassemble your tank regularly. Rinse the parts thoroughly under warm water. Using a gentle brush can help remove stubborn residues.

Remember, neglecting tank maintenance can affect your vaping enjoyment. A neglected tank may not deliver the flavor you'd expect. Regular cleaning can extend the life of your device and maintain the quality of your vape. Prioritize this task to enhance your overall experience.
How to Clean a Vape Tank Properly for Best Performance?

Understanding the Components of a Vape Tank

Understanding the components of a vape tank is crucial for optimal performance. A vape tank typically includes several parts: the tank body, coil, and mouthpiece. The tank body houses the e-liquid. It’s generally made of glass or plastic. Glass is more durable and less likely to react with flavors.

The coil heats the e-liquid, turning it into vapor. Coils come in various resistances, affecting vapor production and flavor intensity. A lower resistance coil usually produces more vapor, while a higher resistance offers a more muted experience. Regularly replacing the coil is necessary for the best flavor. If a coil becomes burnt or discolored, it’s time to change it.

The mouthpiece provides the inhalation point. Some users prefer larger mouthpieces for a more comfortable draw, while others like smaller ones for a tighter feel. Cleaning the mouthpiece is as important as cleaning the tank. Residue can build up easily. Neglecting this can lead to unpleasant tastes. Ultimately, knowing your vape tank’s components allows for informed maintenance, ensuring better vaping experiences. Understanding and reflecting on these details can improve your vape experience significantly.

Vape Tank Cleaning Frequency and Performance Impact

This chart illustrates how the frequency of cleaning a vape tank affects its performance rating. Regular cleaning (weekly) significantly enhances the vaping experience, while infrequent cleaning leads to a noticeable drop in performance.

Gathering the Necessary Cleaning Supplies

Cleaning a vape tank is essential for optimal performance. Before you begin, gather the necessary cleaning supplies. You’ll need warm water, a soft cloth, and isopropyl alcohol. These items help ensure your tank stays in good shape.

A good practice is to have a small bowl and a toothbrush on hand. The bowl is for soaking parts, while the toothbrush can reach those hard-to-clean spots. Having a paper towel available is also smart. You might spill some liquids during the process, and a paper towel can help you tidy up quickly.

As you prepare to clean, think about how often you’ve done this. Many people neglect regular maintenance. This neglect can lead to poor performance. Reflect on your cleaning routine. Consider how you can improve it. Once you have all your supplies, it’s time to get to work.

Step-by-Step Guide to Disassembling the Vape Tank

Disassembling your vape tank for cleaning is crucial for optimal performance. Begin by ensuring your vape is turned off. Carefully unscrew the tank from the device. Be mindful of any residual e-liquid inside. A paper towel can be handy for quick spills.

Once detached, you’ll want to separate the components. This typically includes the glass chamber, the coil, and the base. If you’re uncertain how to separate them, a quick online search could provide steps. Avoid using excessive force, as some parts may be fragile. After disassembly, rinse each part with warm water. This helps remove old e-liquid and residues. Dry the components thoroughly before reassembling.

Tips: Regular cleaning maintains flavor quality. Neglect can lead to a burnt taste. Consider cleaning more often if you switch flavors frequently. Using a small brush can help reach tight spaces. Lastly, don't rush the drying process, as moisture can harm the electronics. Keeping everything clean will ensure a satisfying vaping experience.

Thorough Cleaning Techniques for Each Component

Cleaning a vape tank properly is crucial for optimal performance. Each component of the tank plays a significant role in delivering the desired flavor and vapor production. Without thorough cleaning, residue can build up, leading to poor taste and diminished vapor quality. Industry reports indicate that frequent cleaning can maintain the tank's efficiency by up to 30%.


Begin with disassembling the tank. Remove the mouthpiece, glass, and coil. Rinse the glass and mouthpiece under warm water. Avoid using soap, as some residues can linger. Dry these components completely with a lint-free cloth. For the coil, a gentle rinse can help, but consider replacing it if it shows significant wear. According to studies, neglecting coil maintenance can reduce lifespan by up to 50%.


Next, clean the tank base and threading. Utilize a cotton swab dipped in isopropyl alcohol to remove any grime. This method eradicates stubborn residue while ensuring no cleaning products remain that might alter the flavor. It’s essential to pay attention to even minor build-up, as it can affect the overall experience. Many users don't realize that improper cleaning can lead to leaks or inconsistent performance, reminding us of the importance of meticulous care in every aspect of vaping.

Reassembling and Testing the Vape Tank after Cleaning

Reassembling your vape tank after cleaning requires attention to detail. Make sure all parts are completely dry before starting. Moisture can lead to poor performance or even damage. Check the O-rings for wear or damage. A small tear can cause leaks.

Carefully position the coil in its slot. Ensure it’s snug and secure. If you find it difficult, rethink the alignment. A poorly fitted coil can lead to dry hits. Attach the tank section gently, avoiding too much pressure. Remember, over-tightening can crack the glass.

After reassembling, it's essential to test the vape tank. Fill it with e-liquid and allow it to sit for a few minutes. This helps saturate the coil. Take a few gentle puffs to check for any leaks or unusual sounds. Reflect on your cleaning method. Did you miss a step? Evaluate your process each time for better results. Proper assembly ensures a smoother vaping experience.

How to Clean a Vape Tank Properly for Best Performance? - Reassembling and Testing the Vape Tank after Cleaning

Step Description Tools Needed Estimated Time
1 Disassemble the vape tank carefully. Screwdriver, manual 5 minutes
2 Rinse the tank with warm water. Warm water 2 minutes
3 Use a cleaning solution for deeper cleaning. Vape tank cleaning solution 3 minutes
4 Dry all parts thoroughly. Cloth/towel 5 minutes
5 Reassemble the tank. Screwdriver 5 minutes
6 Fill the tank with e-liquid and test. E-liquid 2 minutes

FAQS

: What are the main components of a vape tank?

: A vape tank consists of a tank body, coil, and mouthpiece. Each part has a specific function.

Why is it important to clean the mouthpiece?

Cleaning the mouthpiece prevents residue buildup, which can cause unpleasant tastes during vaping sessions.

How often should I replace the coil?

You should replace the coil when it appears burnt or discolored. Regular changes enhance flavor quality.

What should I do before disassembling the vape tank?

Ensure the vape is turned off. Be cautious of any leftover e-liquid while disassembling.

Can I use soap to clean the glass and mouthpiece?

No, soap can leave residues that alter the flavor. Rinse them with warm water instead.

Why is thorough cleaning necessary?

Proper cleaning maintains flavor quality and vapor production. Neglecting this can affect performance significantly.

What should I use to clean the tank base?

Use a cotton swab dipped in alcohol to clean grime from the tank base and threads effectively.

How long does neglecting coil maintenance affect its lifespan?

Neglect can reduce the coil's lifespan by up to 50%. Regular care is essential for optimal performance.

What happens if I rush the drying process?

Rushing can trap moisture, harming electronic components within the vape. Always dry thoroughly before reassembling.

How can frequent cleaning improve my vaping experience?

Frequent cleaning can maintain tank efficiency by up to 30%, ensuring better flavor and vapor quality.

Conclusion

Cleaning your vape tank is essential for maintaining optimal performance and ensuring a smooth vaping experience. To understand how to clean a vape tank properly, begin by familiarizing yourself with the various components of the tank, including the glass, coil, and base. Next, gather the necessary cleaning supplies, such as warm water, a soft cloth, and Isopropyl alcohol for tougher residues.

The cleaning process involves a detailed step-by-step guide. Start by disassembling the vape tank carefully, ensuring all parts are separated. Clean each component thoroughly using appropriate techniques—rinse the glass and base with warm water, and soak the coil if needed. Once everything is clean, reassemble the tank and perform a test to make sure it’s working effectively. Regular maintenance of your vape tank not only enhances performance but also prolongs the life of the device.

Sophia

Sophia

Sophia is a dedicated marketing professional with an exceptional depth of knowledge about her company's products and services. With a keen understanding of market trends and customer needs, she crafts insightful blog posts that not only inform but also engage readers, enriching the company’s online......